Colony Flow Level 1 Answer & Walkthrough
A written step-by-step solution for Level 1, with key frames from the real playthrough and the full YouTube video.
Player not loading? Watch Level 1 on YouTube.
Picture Composition
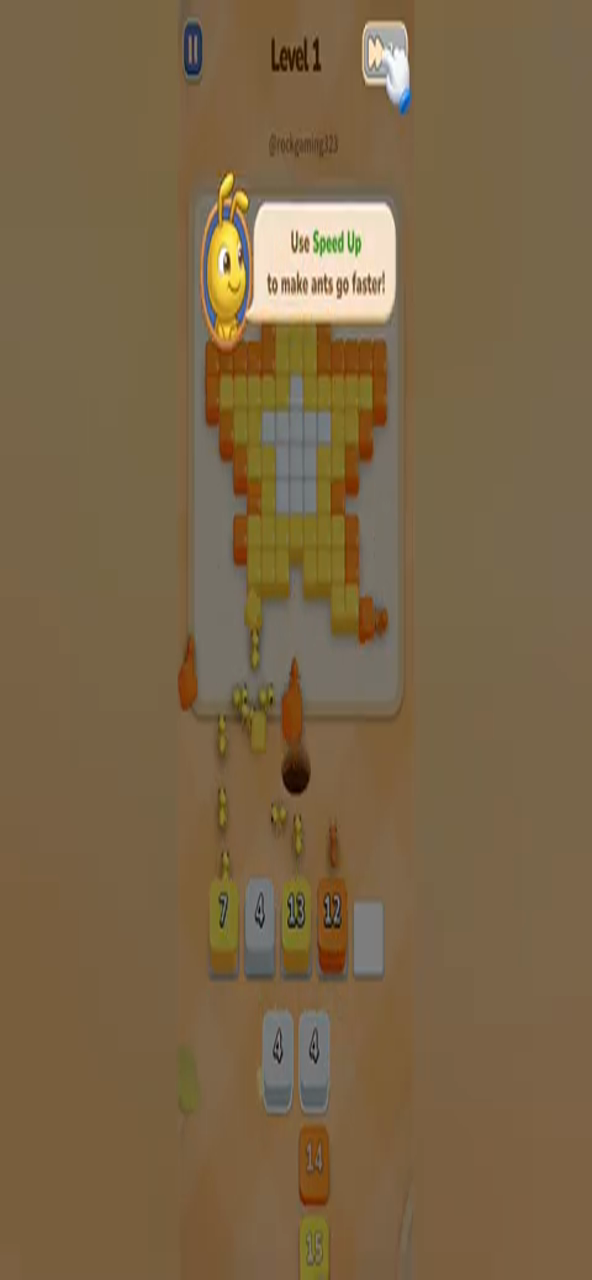
A five-point starfish with three layers from outside in:
Orange: outermost outline (tiles 12, 14)
Yellow: middle body (tile 15, three copies)
White: 3×4 center (tile 4, three copies)
Removal Order
This is the tutorial level — the key idea is "the outer layer covers the inner one, so work from outside in":
Tap Orange 12 first: ants carry away the outermost orange edge (see f_003).
Then Orange 14: orange comes in two batches; the second clears the rest of the outer ring.
Next Yellow 15: with the ring gone the yellow body is exposed — keep tapping yellow (a "Use Speed Up" prompt pops up at f_004; tap the 2x button top-right to speed the ants).
Finally White 4: the center is removed last; tap the three white tiles in turn to finish (f_007 → f_009).
Key Frames
| File | Time | Content |
|---|---|---|
| f_001.png | 0s | Starting starfish, empty queue, 9 number tiles at the bottom |
| f_003.png | 6s | Orange 12 tapped, ants start on the outer layer |
| f_004.png | 9s | Speed-up prompt; orange/yellow/white being carried together |
| f_005.png | 12s | Outer layer mostly cleared, yellow/white remain |
| f_007.png | 18s | Only a little center yellow left |
| f_009.png | 24s | Fully cleared, level complete |
Tips
The queue only has 5 slots (not an issue at 3 colors); remember the rule: always remove the color that sits on top first.
Key Frames for Level 1
Every step of the solve, in order — the mosaic fills in top to bottom as each colour is carried over.

Colony Flow Level 1 FAQ
How do you beat Colony Flow Level 1?
Watch the embedded 0:27 video and follow the written walkthrough on this page: clear the outer layer first in one batch, then move to the next exposed color, working from the outside inward until the picture is empty.
What is the solution to Colony Flow Level 1?
This page gives a step-by-step written removal order with key frames from the real playthrough, plus the YouTube video. Work through each section in order — the outer ring, the middle layers, and the center.
How long is the Colony Flow Level 1 walkthrough video?
The Level 1 walkthrough runs 0:27. The written guide on this page covers the same layer order step by step if you prefer reading.
Is Colony Flow Level 1 hard?
Level 1 is a regular level — clear the outer ring, then the body, then the center.
Adjacent Levels




Stuck on another Colony Flow level?
Every one of the 545 levels has a written solution and a video walkthrough.